Elastic Link Table
|
|
|
|
|
|
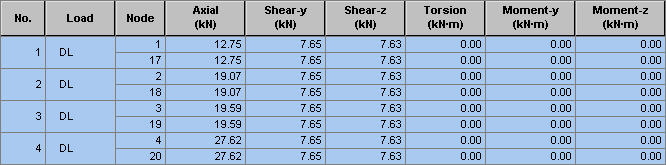
Check the internal forces and stresses of elastic links from the analysis results in a spreadsheet format table.
Table Tool in MIDAS/Gen offers a variety of powerful built-in functions. Refer to the following items for detail directions:
Usage of Table Tool
Terminology
Familiarize with Usage
Basic directions (Cell motion, selection, size control, etc.)
Data manipulation (Add, delete, modify data, etc.)
Copy/Paste data using clipboard
Supplementary Table functions
Table Sorting
Table format setting
Auto-fit column width
Graph printing
Supplementary functions by Table types
Node/Element Table
Results Table |
|
|
|
|
|
|
|
From the Main Menu select Results > Result Tables > Elastic Link.
Select Result Tables > Elastic Link in the Tables tab of the Tree Menu. |
|
|
|
|
|
Upon executing the Elastic Link Table function,
Records Activation Dialog prompts. Click
Note
Refer to Usage of Table Tool and check the following data:
No.: Elastic Link Element number
Stage: Construction stage
Step: Sub-stage
Load: Unit load case
Node: Start & End node number of Elastic Link Element
Axial: Axial force
Shear - y: Shear force in the element's local y-direction
Shear - z: Shear force in the element's local z-direction
Torsion: Torsional moment about the element's local x-axis
Moment - y: Bending moment about the element's local y-axis
Moment - z: Bending moment about the element's local z-axis
|
|
|
 after selecting
the output entities such as nodes or elements, loading conditions, construction
stages, etc.
after selecting
the output entities such as nodes or elements, loading conditions, construction
stages, etc.