Tower Body
Use the Tower Body feature to easily model the body of complex 3-D steel tower structures.
From the Main Menu select Structure> Wizard > Tower Body.
 Tower Body Wizard
Body No.
Enter the section ID.
Show Dimension
Show the body dimensions in preview.
W1, W2
Enter the width of the Body. (W1: Lower part, W2: Upper part)
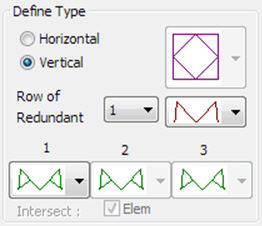
Define Type
|
Define the shape of the body.
(A) Select Horizontal Type and Vertical Type.
(B) Select the number of the row of redundant.
(C)Define the type of the row of redundant. |
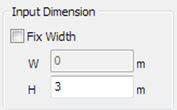
Input Dimension
|
Enter the information for the width and height of the selected part.
(A) Fix Width: Used to fix the upper part width to W.
(B) W: Width of the part (If not select the Fix Width option, it is calculated automatically)
(C) H: Height of the part |
 :
Add a new Part using the information entered after the selected
Part
:
Add a new Part using the information entered after the selected
Part
 :
Modify Selected Part
:
Modify Selected Part
 :
Delete selected part
:
Delete selected part
Insert
Point
Insert Point
Enter the position to insert the created body.
(A) Click the input box and then select the position on the modeling screen
(B) Input location information from the keyboard
Rotations
Rotations
Enter the angle to rotate when inserting the generated body.
(Unit: Degree)
Alpha: Rotation angle about the global coordinate system X axis.
Beta: Rotation angle about the global coordinate system Y axis.
Gamma: Rotation angle about the global coordinate system Z axis.
Origin
Point
Origin Point
Select the node of the body to be placed at the Insert Point.
If you select Origin Point, it will be displayed as a red node in preview.
 : Close
the wizard after inserting the body into the modeling screen.
: Close
the wizard after inserting the body into the modeling screen.
 :
Close the wizard.
:
Close the wizard.
 :
Insert the body into the modeling screen and close the
wizard.
:
Insert the body into the modeling screen and close the
wizard.