Generator Feature: Revolve Shape
![]()
Function
Revolve a profile (Face, Wire, Edge) into a Solid, Shell or Face. A Face, Wire and Edge can be extruded only into a Solid, Shell and Face respectively. A closed Wire or Edge can be used to create a Solid using the Solid option.
Call
Geometry > Generator Feature > Revolve
<Revolve>
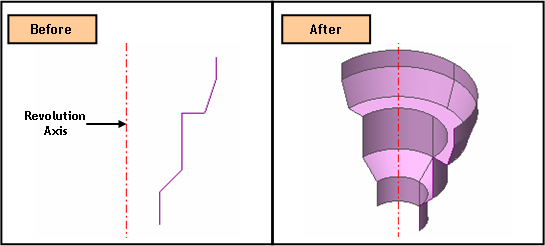
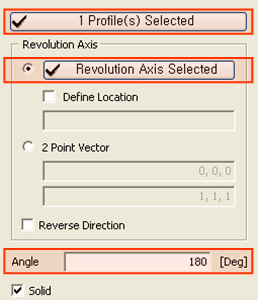
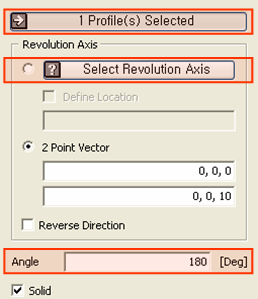
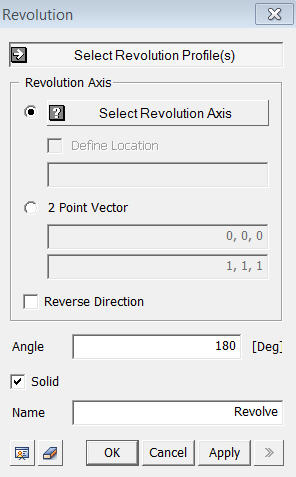
Select Revolution Profile
Select
a profile (Face, Wire, Edge) to be
revolved.
Revolution Axis
Select
an Axis (Datum Axis, Edge) for revolution.
Select Revolution Axis
Select a revolution axis (Datum Axis, Datum Plane, Face, Edge) directly.
Define location
Define the location of revolution axis. The coordinate of Define Location can be specified
using Snap.
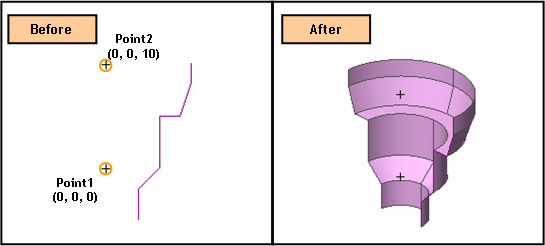
2-Pt
Vector
Specify the revolution axis by a vector which is defined
by two specified points. The coordinates of two points may be specified
using Snap.
Angle
Specify
a revolution Angle.
Name
Enter the name of the shape to be created.
Reverse Direction
Revolve
the selected profile in the reverse direction.
Solid
This option is used to create a Solid using a closed Wire or Edge. Using the option with an open profile will not result in an error, but an improper shape may be created.
Notes
A revolved geometric shape such as Cone and Sphere causes a singular vertex at its apex during mesh generation. At the singular vertex, a number of element nodes comes together. Consequently, it often yields abnormal analysis result. This singular vertex is inevitable for every type of revolved shapes due to revolution axis. Therefore, it must be corrected after it was generated manually using Re-meshing Feature.