Bridge Girder Diagrams
The member forces and stresses of each element constituting the bridge girders are produced in the form of a graph. The stresses due to axial forces and bending moments may be combined and compared with the allowable stresses.
From the Main Menu select Results > Bridge > Bridge Girder Diagrams.
 Load Cases/Combinations
Select the load cases/combinations for which the results output is desired. When a construction stage analysis is carried out for a bridge structure, the following loading conditions are auto-generated and the analysis results are saved separately.
Using the auto-generated loading cases, loading combinations may be formulated in "Combinations". The results for the auto-generated load cases as well as the additional load combinations can be checked for each construction stage including the Min/Max of each stage.
Dead Load: Analysis results for all the dead loads included in the construction stages including the Self Weight
Erection Load: Analysis results due to all permanent loads applied to the construction stages excluding Dead Load
Note
For further details on Erection Load, refer to Analysis> Construction Stage Analysis Control.
Tendon Primary: Analysis results for prestressing forces in tendons
Tendon Secondary: Analysis results for indeterminate condition between the prestressing forces in tendons and the bridge structure. (secondary stress)
Creep Secondary: Analysis results due to indeterminate condition between the creep forces and the bridge structure. (secondary stress)
Shrinkage Secondary: Analysis results due to indeterminate condition between the shrinkage forces and the bridge structure. (secondary stress)
Summation: Analysis results summing up all the conditions above (Summation = Dead Load + Erection Load + Tendon Primary + Tendon Secondary + Creep Secondary + Shrinkage Secondary)
Creep Primary: Analysis results due to Creep, which is due to an imaginary force to cause the creep deformation
Shrinkage Primary: Analysis results due to Shrinkage, which is due to an imaginary force to cause the creep deformation
The analysis results for the auto-generated load cases cannot be reviewed at the Final Stage; however, the results for the additional load combinations may be reviewed
Step List
When a construction stage analysis or a geometric nonlinear analysis is performed, select the steps for which the analysis results are desired. Several steps may be selected, and the results may be produced in one graph.
Load Case/Combination
Select the load cases/combinations.
Diagram Type
Select a diagram type for the graphs of the results to be produced.
Stress: Display normal stress diagram.
Force: Display force/moment diagram.
Batch: Display a diagram by selecting the predefined diagram group. For example, top stress and bottom stress diagram can be displayed at the same time in one graph.
X-Axis Type
Select the representation type for the x-axis.
Distance: Distance from the starting point
Node: Node numbers (not to scale)
Bridge Girder Elem. Group
Select the element group that contains the girders for which the results are desired.
Note
If Bridge Wizard is used for modeling, the main girders will be assigned the element group name, "Bridge Girder".
Components
Select the desired stress component among the following:
Sax: Axial stress in the element's local x-direction
+Sby: Bending stress at the element's local (+)y-end resulting from the moment (Mz) about the element's local z-axis
-Sby: Bending stress at the element's local (-)y-end resulting from the moment (Mz) about the element's local z-axis
+Sbz: Bending stress at the element's local (+)z-end resulting from the moment (My) about the element's local y-axis
-Sbz: Bending stress at the element's local (-)z-end resulting from the moment (My) about the element's local y-axis
Combined: Combined stress (Combined stress: Sax ± Sby ± Sbz)
Combined (Axial+Moment)
Maximum: Combined stress representing the absolute largest among combined stresses at 1, 2, 3 and 4
1(-y,+z): combined stress at 1
2(+y,+z): combined stress at 2
3(+y,-z): combined stress at 3
4(-y,-z): combined stress at 4
Fx : Axial force in the element's local x-direction
Fy : Shear force in the element's local y-direction
Fz : Shear force in the element's local z-direction
Mx : Torsional Moment about the element's local x-direction
My : Bending Moment about the element's local y-direction
Mz : Bending Moment about the element's local z-direction
Allowable Stress Line
When 'Stress' is selected in Diagram Type, specify whether to display the allowable stress line.
Draw Allowable Stress Line: Check on to draw the allowable stress line.
Comp.: Allowable compressive stress
Tens.: Allowable tensile stress
Generation Option
Current Stage-Step: Produce the graph for the current construction stage or step.
Stages (Last Step): Produce the graphs for multiple construction stages/steps simultaneously.
![]() : Click to prompt the Stage Output Detail dialog box and select the desired construction stages/steps for the production of diagrams.
: Click to prompt the Stage Output Detail dialog box and select the desired construction stages/steps for the production of diagrams.
Select stages to output
Check on the desired construction stages/steps for Diagram production. The diagrams are produced using the Last Steps of each construction stage.
Auto-save graph
The diagrams may be saved as graphic files. Specify the file path, name and type.
.jpg)
|
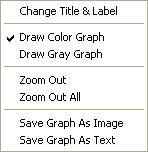
Right-click on the Bridge Girder Stress Diagram displayed on the screen to prompt the following Context Menu: |
|
|
|
Change Title & Label Draw Color Graph Draw Grey Graph Zoom Out Zoom Out All Save Graph As Image Save Graph As Text |